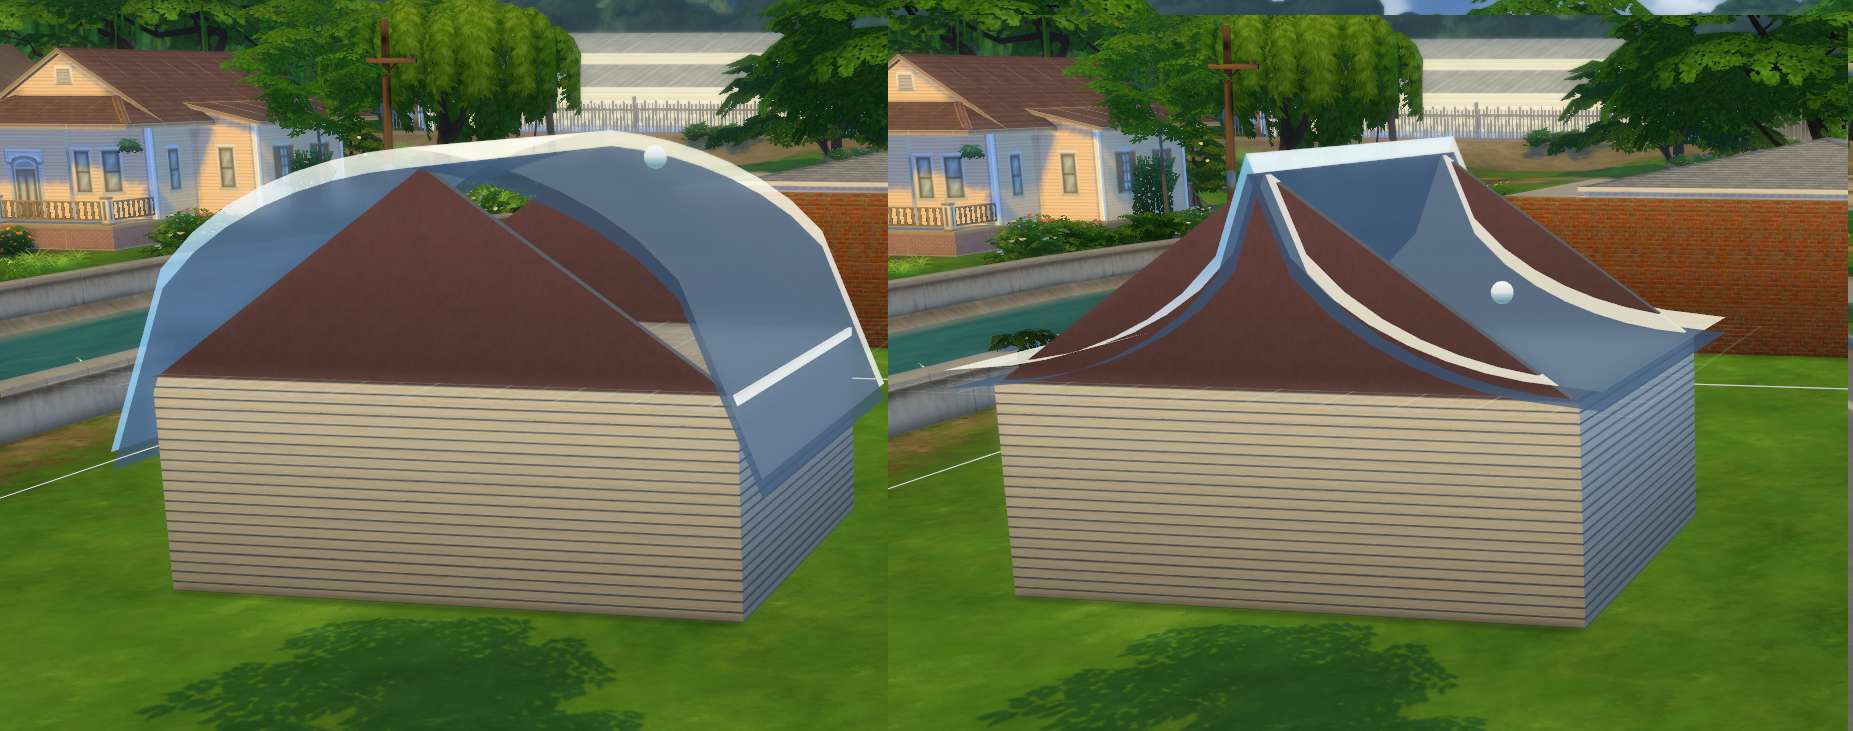
Placing Sloped Roof Other Direction
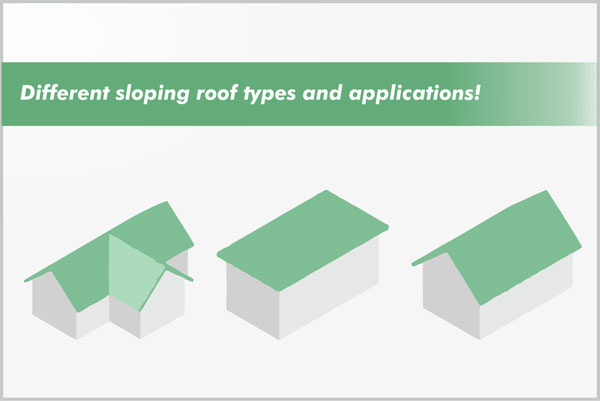
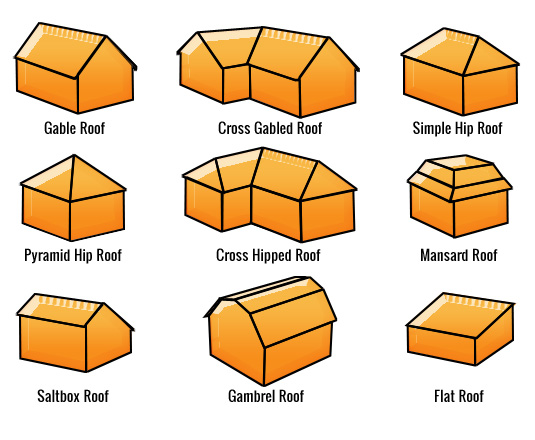
Different Sloping Roof Types And Applications Constro Facilitator
Roof Calculations Of Slope Rise Run Area How Are Roof Rise Run Area Or Slope Calculated

Pin On Home Exterior Roof Garage

How To Draw Sloped Ceilings Roofs App Roomsketcher Help Center

How To Build A Shed With A Sloped Roof Hunker Building A Wood Shed Wood Shed Plans Firewood Shed

Different Sloping Roof Types And Applications Tech Crafts Metal Buildings Pvt Ltd
Optional refine the sloped surface using one of the following methods.
Placing sloped roof other direction.

Tara Villa By Idin Architects In 2020 Architect Villa Residential Construction

Best Modern House Design With Sloping Roof And Flat Roof House Design Best Modern House Design Modern House
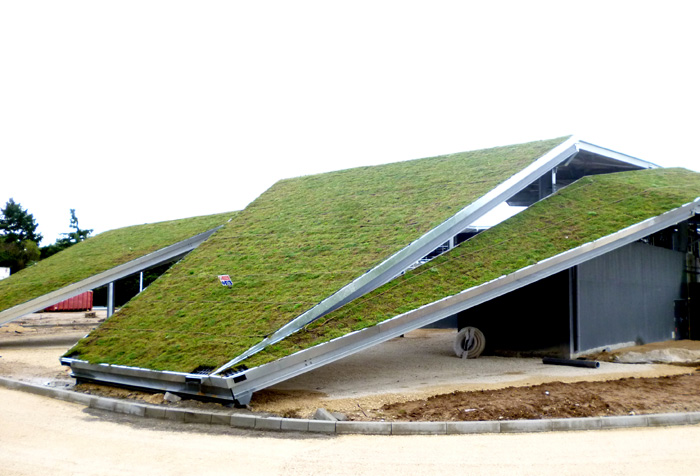
Steep Pitched Green Roof With Hydropack Vegetal I D

Construction Sloping Roof Using Mixer Truck Latest Technologies Building Sloping Concrete Roof Youtub Concrete Roof Roofing Contractors Reinforced Concrete

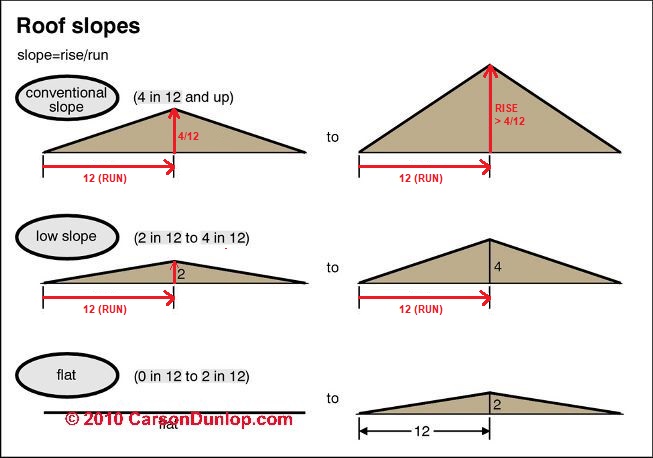
Measuring Roof Slope And Pitch Internachi
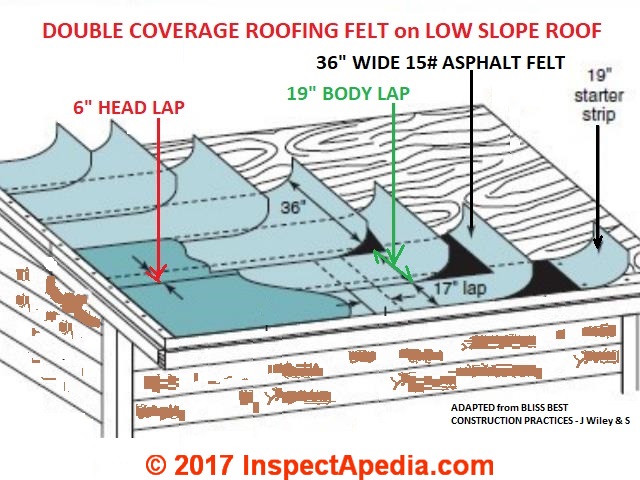
Double Vs Single Layer Felt Underlayment On Roofs

Revit Roof Tip 2 Activate Slope To Create Sloped Roof Youtube

Construction Sloping Roof Concrete Easy Pour Concrete Step By Step Buiding Skills Youtube Poured Concrete Concrete Steps House Construction Steps

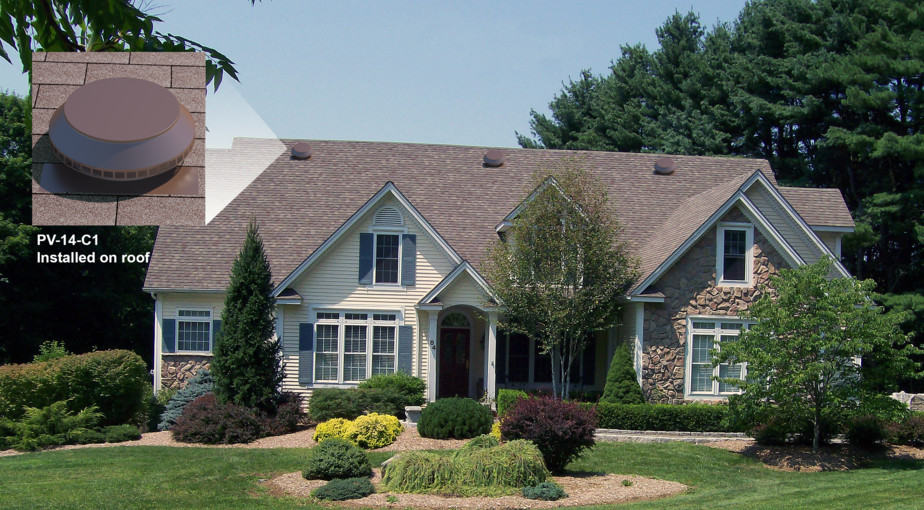
How To Install Corrugated Roofing Corrugated Roofing Roof Installation Corrugated Metal Roof

Common Rafter Framing Thisiscarpentry

9 Tips To Understand Revit Roofs Revit Pure
The Sims 4 Building Roofs

Plan 92305mx Mountain Home With Vaulted Ceilings Craftsman House Plans House Plans Cottage House Plans

Plan 60631nd Craftsman Home With Vaulted Great Room Architectural Design House Plans Craftsman House House Plans

Plan 24382tw 3 Bed Craftsman With Angled Garage For A Rear Sloping Lot Craftsman House Plans Craftsman House House Styles
Roof Ventilation For Steep Slope Roofs Benefits The Attic All Year Long

Is It Possible To Install Solar On A Sloped Roof Without Drilling Holes

Single Slope Roofs
Https Encrypted Tbn0 Gstatic Com Images Q Tbn 3aand9gctrkrcd4no7cjjocilgx8yrsmkbtjfemf2c7vzuvphsnxwv 3bs Usqp Cau

1 Craftsman Pyramidal Pyramid Roof In 2019 Hip Roof Hip Roof Design Roof Design
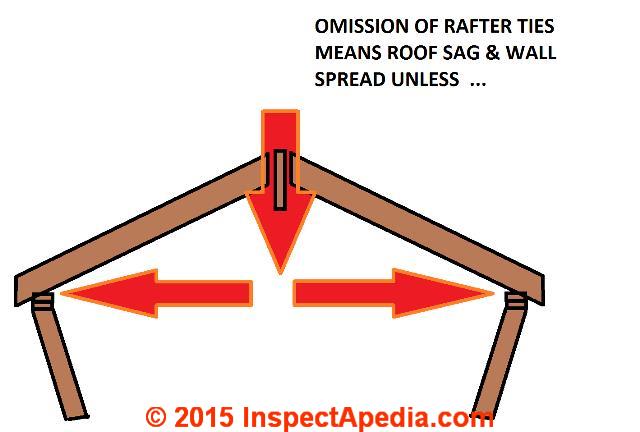
Causes Of Sagging Rafters Leaning Walls Collapsing Roofs
Roof Pitch

Patio Garden In 2019 Copper Roof Roof Decoration Decorative Boxes

Why Can T I Place This Wedge Sloped Roof Conanexiles
Source : pinterest.com
